
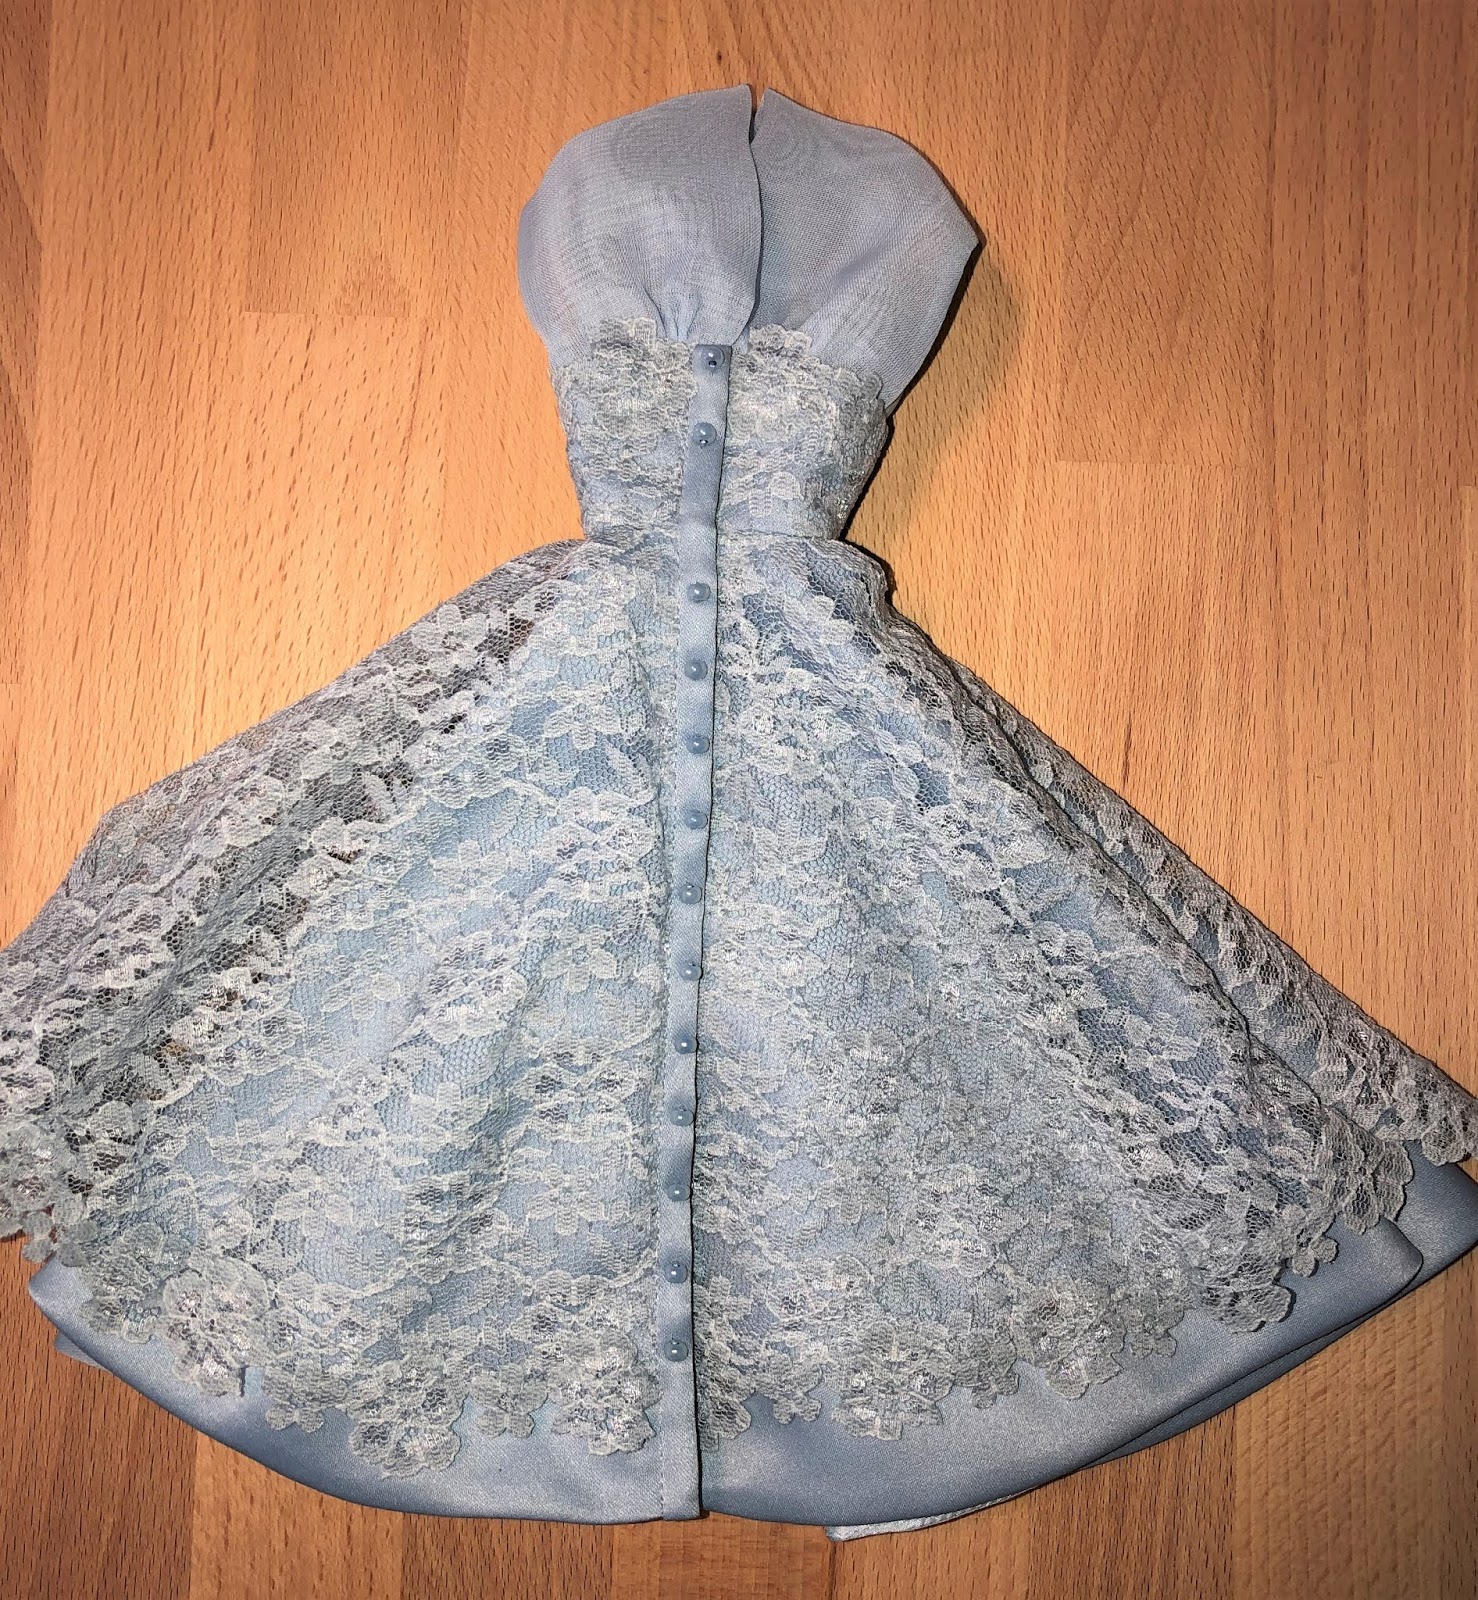
This lovely dress was inspired by a 1953 Pierre Balmain design.


For more information and photos, click here. (coming soon)
Click on the photos to make them larger.
Dress

Tape the skirt pattern together.

Baste the lower bodice lace pieces right side up to the right
side of the lower bodice satin pieces.
With right sides together (WRST) stitch the lower bodice and lower
bodice lining side seams. Press the seam
allowances open.
Cut 1/4" off the right front of the lower bodice and the
lower bodice lining. Be aware that the lower
bodice lining is opposite of the lower bodice and should mirror it.

Stitch 1/4" along the waist of the lower bodice lining to mark the seam allowance. Press up the seam allowance.

Stitch the skirts' center back seam.

Lining

Stitch
the top half of the skirt’s left front to the lining.

Turn the skirt right side out and press the stitched seam.
Stay stitch the top of the skirt pieces together.

Mark and cut 1/4" off the right center fronts of all three skirts.

WRST, pin the lower bodice to the skirt at the waist, ease the skirt to fit the waist
if necessary. The front left side of the
lower bodice should extend 1/4” out from the skirt. The right front of lower bodice and skirt
should match up to each other. Stitch
the lower bodice to the skirt.

Right side

Left side
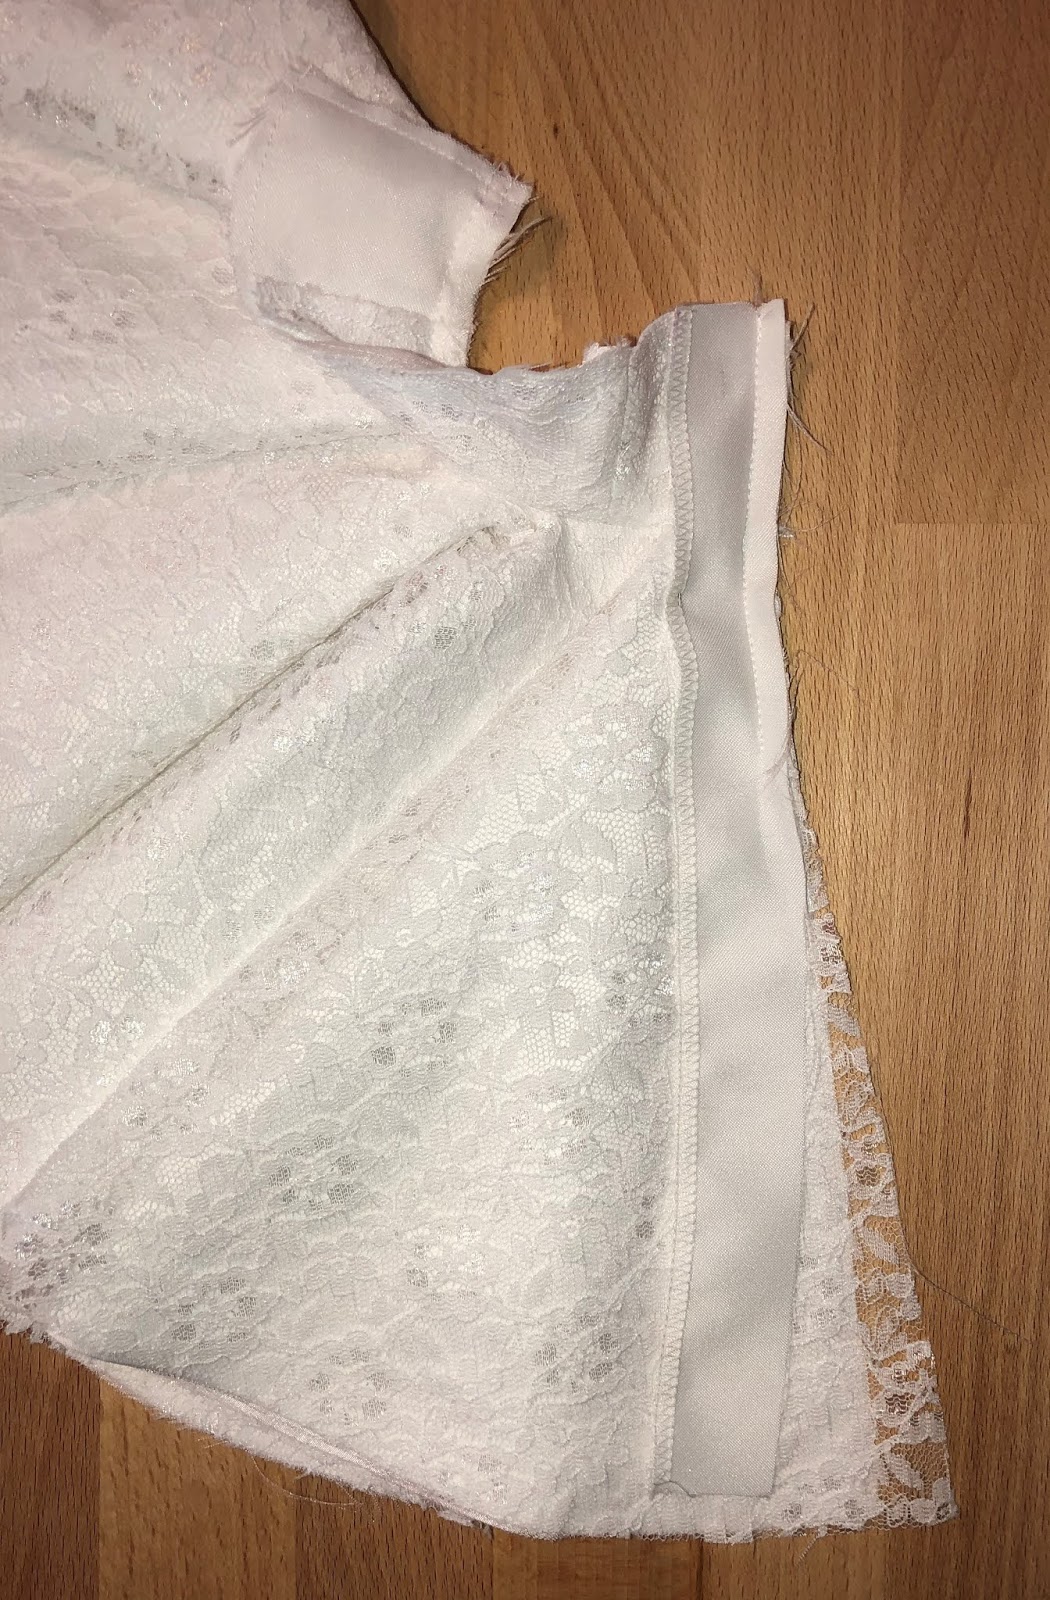
Serge, zig-zag, or Fray-Check one long edge of the front
placket. WRST stitch the unfinished side
of the placket to the right side of the dress from the top of the lower bodice
to about half way down the skirt. Use a
3/16” seam allowance, otherwise the finished placket will be a little too wide.

Press the stitched part of the placket flat with the seam allowances towards the placket.

WRST stitch the center back seam of the upper bodice. Press the seam allowance open.

WRST fold the bodice in half along the foldline and stitch the armholes. If the using chiffon for the upper bodice, I recommend using a short machine stitch. Trim the armhole seam allowance and carefully Fray-Check the edge of the seam allowance. Once the Fray-Check has dried, clip the curves. Turn the upper bodice right side out and press it flat.

Baste the bottom of the back of the upper bodice closed. Gather-stitch the bottoms of the upper bodice
fronts. WRST pin the upper bodice to the
lower bodice, matching the center backs.
The edges of the armholes should butt up to each other at the lower
bodice’s side seams. The front of the
upper right bodice should butt up against the front placket and the front of
the lower left bodice should extend 1/4" from the front of the upper left
bodice, like the skirt. Pull the
gathering threads on the upper bodice fronts and keep the gathers between the
markings on the lower bodice only. Baste
the upper bodice to the lower bodice.


WRST, stitch the lower bodice lining to the dress.

Under-stitch the lining.

Press down the seam allowance on the left front of the lower bodice and hand stitch the lining to the dress at the waist.


Put the dress on a doll and pin the dress together at the
front. Let the dress hang on the doll
for a day or so to allow the skirt to “hang-out”. Pin up the lace skirt to get it out of the
way. Mark the hem of the dress by
measuring up from the table to the desired length of the dress. I marked the dress 3 1/4” up from the
table. Use a lot of pins to mark the
hem.

Remove the dress from the doll and use a disappearing ink pen to mark where the pins were. It is especially important to make sure the fronts of the skirts are exactly the same length.

WRST pin the satin skirt to the lining, keeping the lace
skirt free. The satin skirt and the lining
fabrics may have “hanged out” differently and may not be the same length any
more. Make sure the skirts are smooth on
top of each other with no bubbles.
Stitch the hem along the marked line.

Trim the seam to 1/4".

Under-stitch the skirt lining.

Turn the skirt right side out through one of the front openings and press the hem.

Put the dress on the doll and pin the dress together. Pin up the front placket to get it out of the
way. Cut off the bottom of the lace
skirt about 3/4"-1” shorter than the satin skirt. It doesn’t have to be perfect because bottom
of the lace skirt will be covered with lace flowers.

Turn the skirt inside out and finish
stitching the left front of the dress.
Trim the corner, and turn the skirt right side out through the right
front opening. Press the seam flat. Finish stitching the placket to the right
front of the skirt. Remember to sew the 3/16”
seam allowance! Press the placket flat
and cut the bottom of the placket off leaving a 3/8” seam allowance. Press down the seam allowances on the top and
bottom of the placket. Fold the placket
along the edge of the seam allowance to the inside of the dress and press. Stitch in the ditch to sew the placket down
to the dress. The placket should be 1/4”
wide.

Finish cutting the bottom of the lace skirt.

Fray-Check the bottom of the lace skirt for stability.

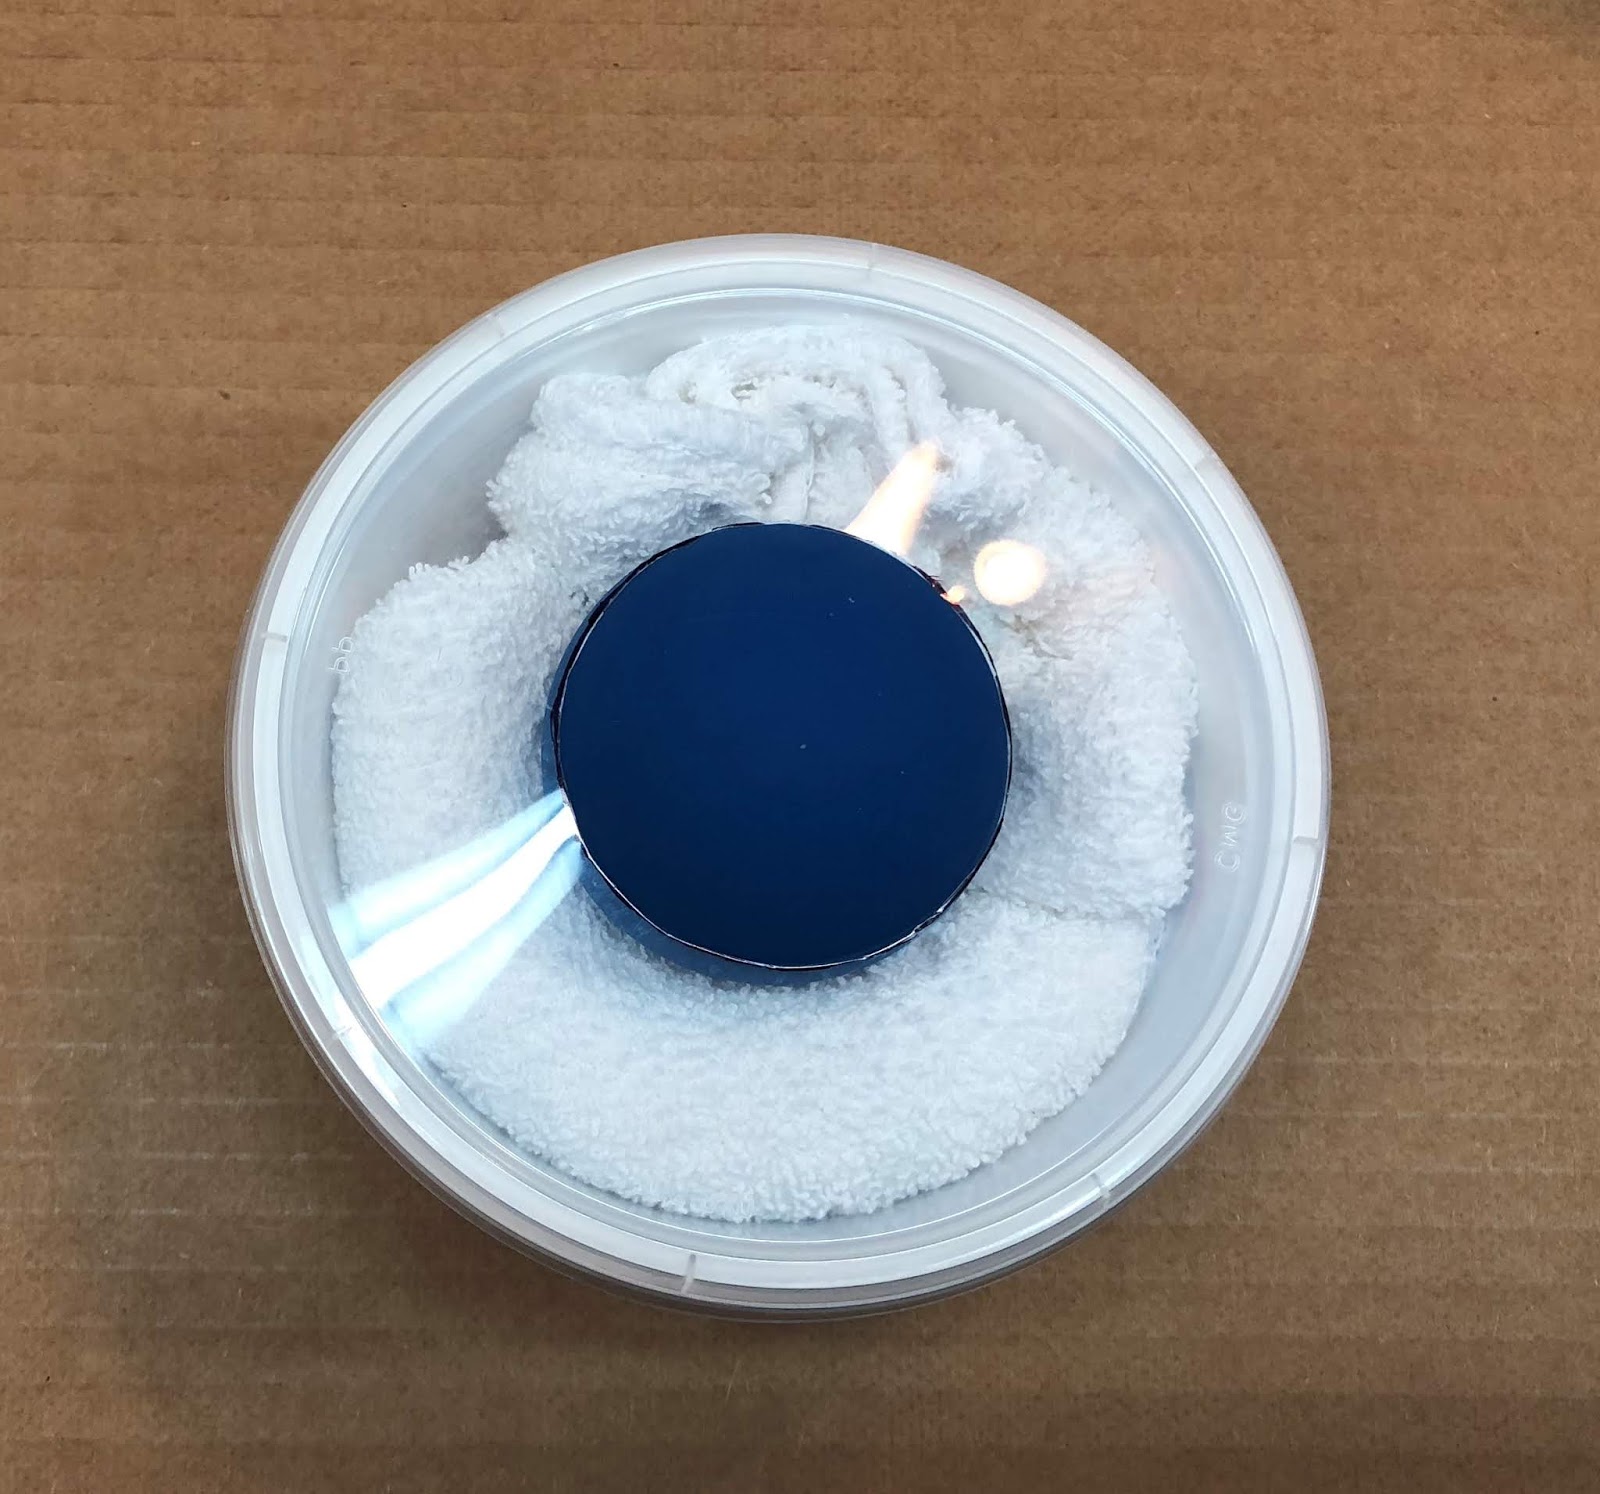
Rough cut lace flowers out of the lace fabric scraps. Stick a pin in the middle of each flower and
Fray-Check the edges of the flowers.
Stick the pins in a pin cushion to allow the Fray-Check to dry. After the Fray-Check has dried, cut around
the flowers. Cut enough flowers to cover
the hem of the lace skirt and the top of the lower bodice fronts.

Put the dress on the doll and pin the flowers to the bottom
of the skirt. Make sure the flowers at
the front of the skirt are level with each other.

Hand stitch the flowers to the skirt.

Hand gather the top 1 1/4” of the back upper bodice.


Sew beads, hooks, and thread loops to the front of the dress. The centers of my beads ended up being spaced about 9/16” apart and the hooks on the skirt are sewn under every other bead.

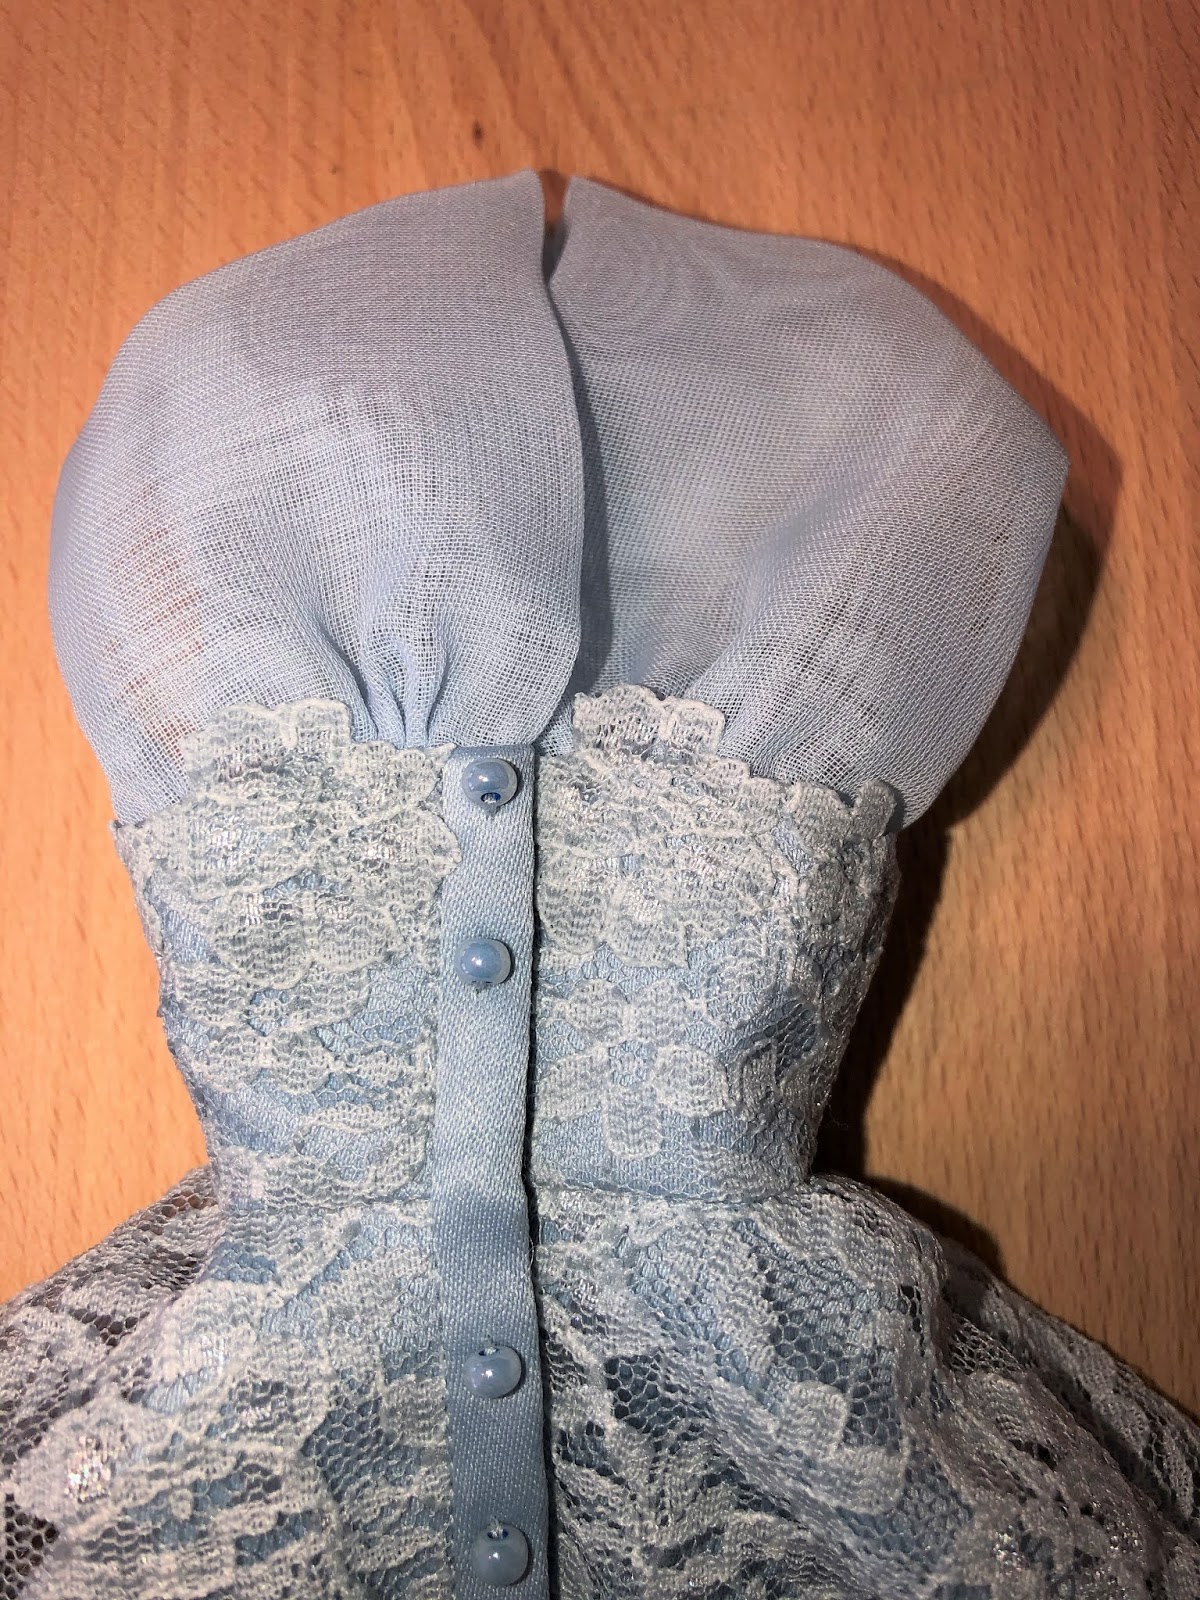
Don’t sew a bead at the waist, because of the belt. Hand sew lace flowers to the bodice fronts.

This dress is constructed omitting the lace skirt. Lace trim was hand stitched to the top of the
lower bodice.
Belt

I stitched the lace belts by hand.


Straw Hat A

The hat straw has a thread on each side of it that can be
pulled to make the straw curve. Find the
thread on one side of the straw and gather up quite a bit of the straw. Gather more than you think you will need
to. The first few rows of the hat brim
will not need the straw to curve very much, so push the gathers up the length
of the straw.

Starting on the outside edge of the lid, press the hat straw
into the tape and around the lid. Tuck
the end of the straw under the hat brim and it will be covered as you shape the
brim. Glue along the inside edge of the
straw and cover the glue with another layer of the straw. Keep gluing the rows of straw until you reach
the juice lid.

Overlap the straw a little bit and cut, Fray-Check the end,
and glue the end down when the Fray-Check is dry. If you run out of gathered straw before you
finish the brim, just find the thread farther down the length of the straw and
pull to make more gathers. Don’t cut the
thread there though!

Using the opposite, un-gathered end of the hat straw, shape the hat
crown by wrapping and gluing it around the juice can lid.

Cover the top of the juice lid with double sided tape. Shape the top of the hat by starting in the
center of the juice lid. Glue the straw
into a circle until it is as big as the hat crown.

Remove the three hat pieces from the hat block.


The three hat pieces can be either glued or hand sewn
together. I prefer hand stitching the top
to the crown first and then gluing the crown to the brim.


Hot glue a piece of ribbon around the hat crown.

Make a bow by marking 1 1/4" on the ribbon.

Fold the ribbon at the marking and glue the end of the ribbon to the ribbon making a loop.

Keep folding and gluing the ribbon until you make a bow with 6 loops.


Glue the bow to the left front of the hat.
Straw Hat B


Cover the top of the ball with double sided tape.

Cut a 1 1/2" of straw and Fray Check the ends. Place it on top of the ball.

Prepare your hat straw by pulling on the thread on one side of the straw to get it to curve.

Place pins about 1/4" in on each end of the strip. Glue the sides and wrap the curved straw around the pins.


Cut the end and Fray Check it. When the Fray Check is dry, glue the end to the hat.

Make a bow out of the straw and stitch it to the side of the hat.
Gloves

Mark the stitching lines on tissue paper.

Pin down top of gloves and pin pattern onto the fabric.
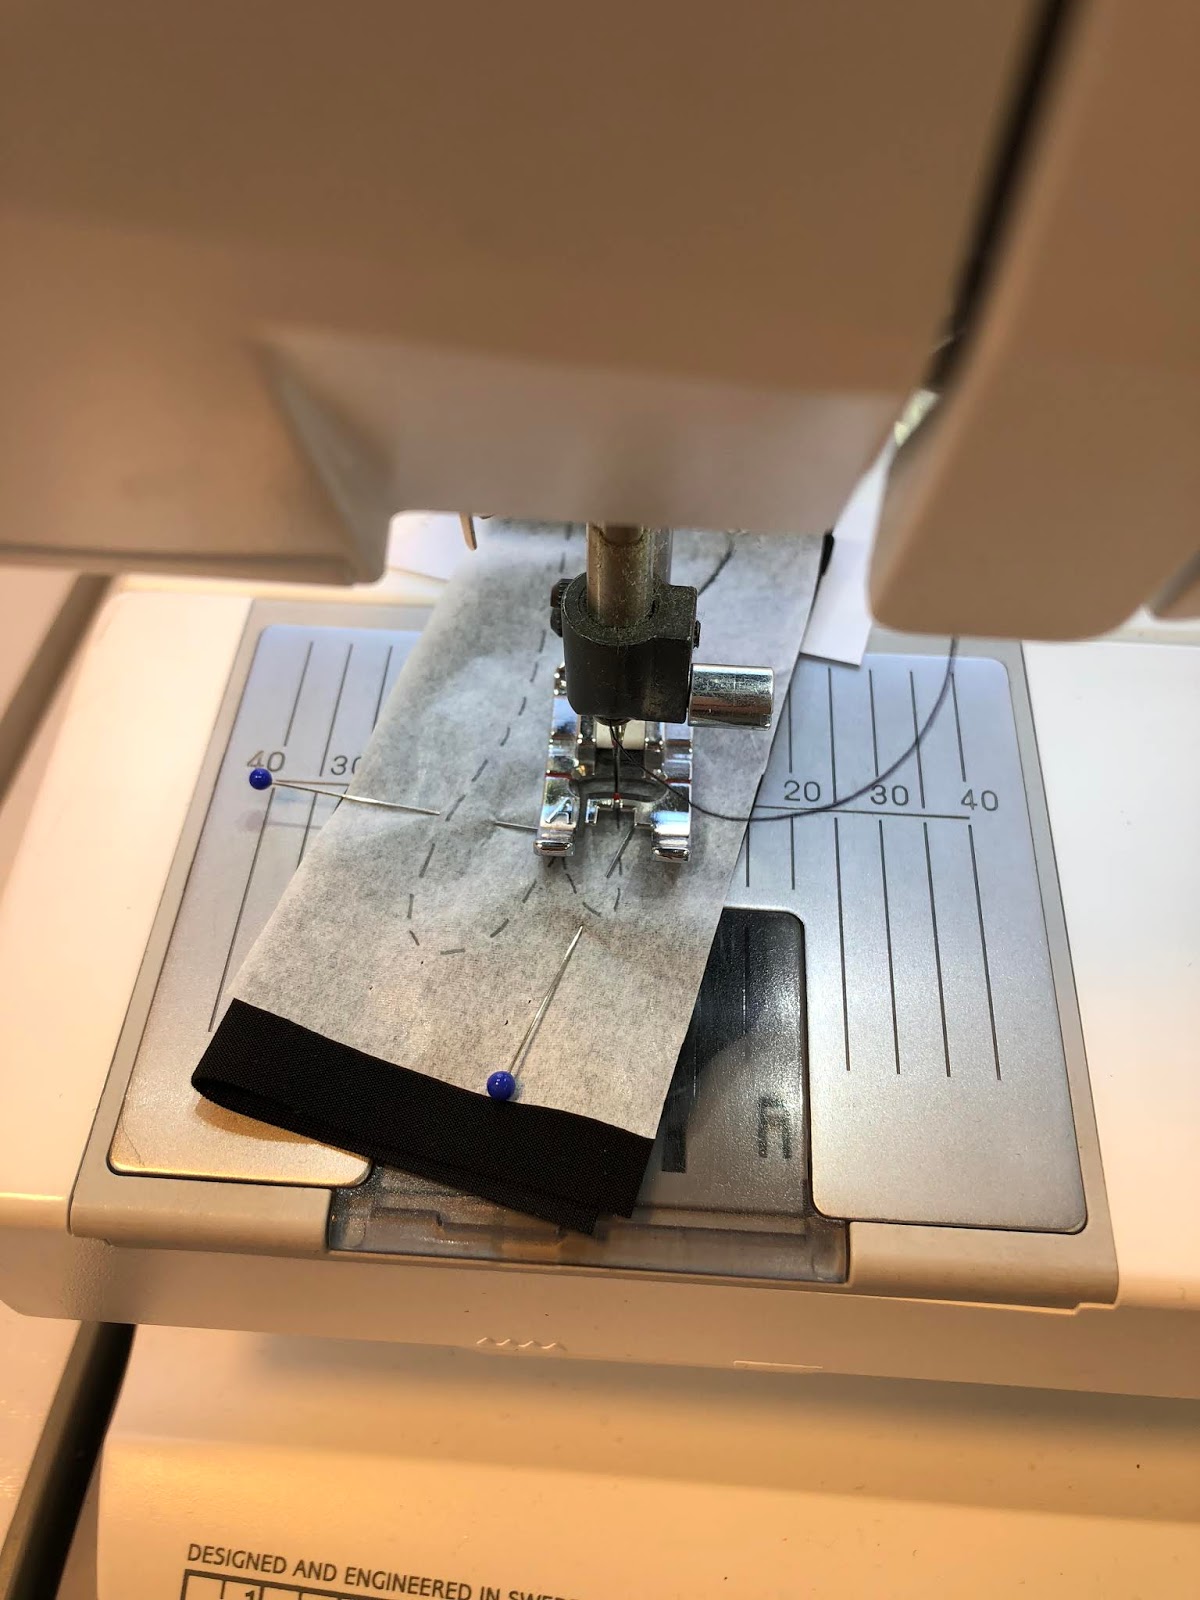
Stitch

Use strips of copy paper to keep the sewing machine to eat up the gloves.

Remove tissue paper and trim close to the stitching. Clip the thumbs.

Turn the gloves right side out.